All Things Andrea

All Things Andrea

Tuesday, January 29, 2013

Yo Yo Heart


A quilting buddy gave me this to me last night - cute, huh?

:)

Sunday, January 27, 2013

Yo Yo Quilt


I've been stitching yo yo's for several years now, almost obsessively at times, without knowing what exactly they were destined to become.  But as many a quilter will tell you, if you listen, your quilt will tell you what it wants to be.  Sometimes it's best to follow your heart and proceed without knowing where it's going to end up!
 
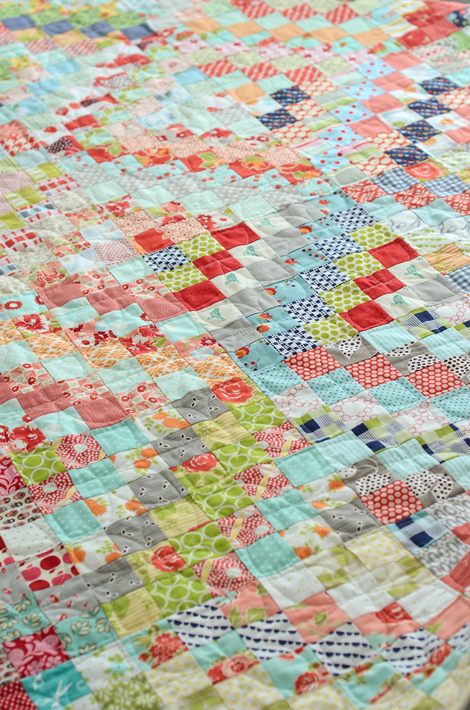
It wasn't until I saw this picture on Pinterest that I knew what this quilt was going to become.  I loved the  idea of using solid colored yo yo's as sashing.  And, the thought of stitching the yo yo's together in blocks seemed much less daunting than tackling a whole quilt all at once.
 
 
So, I sketched out a graph and calculated how many yo yo's I would need.  I counted up my completed yo yo's and determined that by making the blocks 6 yo yo's by 6 yo yo's, and the quilt 4 blocks by 5 blocks, I would only need to stitch a few more yo yo's to come up with 720 yo yo's out of printed fabrics that would be required.  Yea!  I would still need to make 324 solid-colored yo yo's, but I could always cross that bridge later.  :)
 
Once I had a plan in place, I was motivated to start stitching the yo yo's together in blocks, something I had been dreading.
 
 
I had started whip stitching some together a while ago,
 
 
but didn't like how they looked on the reverse side. 
 
 
And, I was stumped on how to make sure they intersected at the right spots without getting distorted.  That was enough to make me put the project aside.
 
 
Then, via Pinterest, I discovered another quilt blog that showed how to stitch yo yo's together by machine.  I was greatly encouraged!!
 

You simply select the button stitch feature (a better option than a zig zag stitch as it securely fastens the stitch),


and foot #9 for you Bernina folks.
 
 
I was so pleased with how nice it looked on both the front side...

 
... and the reverse side.
 
 
And, it was so much easier to keep them properly aligned when stitching them by machine vs. by hand.

 
To be continued!

Another Project Finished!


I finally got back to mounting my freshly-painted living room curtain rods today.  I had taken the day off work last week to finish painting them (what a way to spend a vacation day!) since I never get around to this kind of stuff on the weekend, then needed to let them dry for a few days before mounting them.  Since it's been way too cold to be painting outside, I finished painting them with a brush and some leftover trim paint instead of spray painting them like I had intended.  I should have brush painted them instead of spray painting from the beginning - what a mess!  I ended up with a very fine mist of white paint dust all over the garage.  Thankfully it cleaned up fine.  Those do-it-yourselfers may sing the praises of spray paint, but I have yet to be convinced - I always end up with more paint everywhere else (sorry, atmosphere!) than I do on the item I'm trying to paint.  Even my nostril hairs were white at the end of the day; I hate to think how much paint I ingested - ugh!!


I like how they match instead of contrasting with the crown moulding,


and also like how they tie in with the office curtain rods now. 

I could have bought new rods for the living room, but figured it would be cheaper (and hopefully greener) to repaint them.  (I had gotten the office rods and rings for a steal of a deal - 90% off at Sears back when I made the curtains, and have always felt the mismatched look of the rings and rods was worth it - they didn't have any white rings left, so I settled for the pale green, but I'm happy with the look.)

Anyway, glad to cross this project off the to-do list!

Today...


Preshrinking...


... and cutting out fabrics for a Scrappy Bull's Eye Quilt.


Since I'm using a number of reds and pinks in this quilt, I decided to try these Shout Color Catcher sheets  so the colors don't run.  I'm not sure how much it helped, but I figured it couldn't hurt!  


Also, I started stitching my red & white fabrics into yo yo's ...


for that lovely "Peppermint Yo Yo Quilt" I fell in love with via Pinterest.

:)

Saturday, January 26, 2013

A Lovely Day

I had a fun day with my dear long-time friend Denise! 


We started with some quilt fabric shopping at several quilt stores including this very nice quilt shop in Hagerstown.


I had fallen in love with these Pam Kitty by Lakehouse fabrics after seeing them on a number of quilt blogs, but it was way better seeing them in person!  They are simply lovely....


Then, we hit the Offray Ribbon outlet.


(Yep, looks like an outlet, doesn't it!)


BUT, this is what $14.83 will buy you!


This ribbon is luscious...


... and makes the most beautiful bows!


This pile of grosgrain ribbon was a whopping $.25!!


Then, we stopped in at this little gift shop in Funkstown.


 It was dear!  It had a very similar feel to Terrain at Styers - so fun!


We wrapped up our fabric shopping with stops at JoAnn's and Hobby Lobby (my first time at HL - was impressed!), then dinner at The Olive Garden.  Denise has a great eye for color  I was so grateful for her assistance in selecting fabrics for my Scrappy Bull's Eye quilt


Then, to top off the day, she gave me a lovely Ironstone pitcher for my birthday since she knows I collect Ironstone!


I love the crazing...
Thanks, Denise!


Thursday, January 24, 2013

Today...


Replenishing my supply of chicken stock - it's the little things in life that make me oh, so happy!

:)

Monday, January 21, 2013

Knitted Rag Rug


I was so happy to come across (via Pinterest, of course!) the directions to knit one of these rag rugs.  (Amanda Jean Nyberg, author of the Crazy Mom Quilts blog, happens to also be the co-author of Sunday Morning Quilts, the book that helped to shape my new approach to quilting last summer.)
The directions call for strips of fabric 1/2 -1" wide (or somewhere close to that) - the very thing I've been saving for years because I couldn't bear to part with them.  So, I have a nice supply already started and look forward to making one of these rugs when I've accumulated enough strips!

Sunday, January 20, 2013

January Knitting

Scrappy Trip Around the World Quilt


I am having so much fun with these "Scrappy Trip Around the World" quilt blocks!  It's an on-line Quilt Along that has gone viral!  Lots of quilters in blogland are participating; it's a ton of fun to see who all is participating,

photo by Messy Jesse
  from this quilter in England,

scrappy trip around the world
photo by Camille Roskelley


My fabric strips are ready and waiting to be turned into more blocks. 


(I love how the fabric colors match my sewing room!)


I had to piece a few strips to get the length I needed, but it felt good to make use of the fabric - almost makes me feel connected to those quilters of eras long ago who had no other choice than to piece their precious fabrics together if they wanted to make a quilt.

Click here for the link to the directions.

You can make the quilt any size you want - just stitch as few or as many blocks as you wish.
Time will tell how big my quilt will end up being!

Today I learned....

photo by Constanca Cabral

 ...a better way to make a quilter's knot (via Pinterest, of course!!).  I've been sewing since I was in kindergarten - why in the world did it take me until now to discover this??!!)  It's the perfect knot for use for stitching yo yo's.

And...

photo by SewTakeAHike
...how to stitch yo yo's together by machine.  (Why didn't I think of that all by myself??!!)

:)