
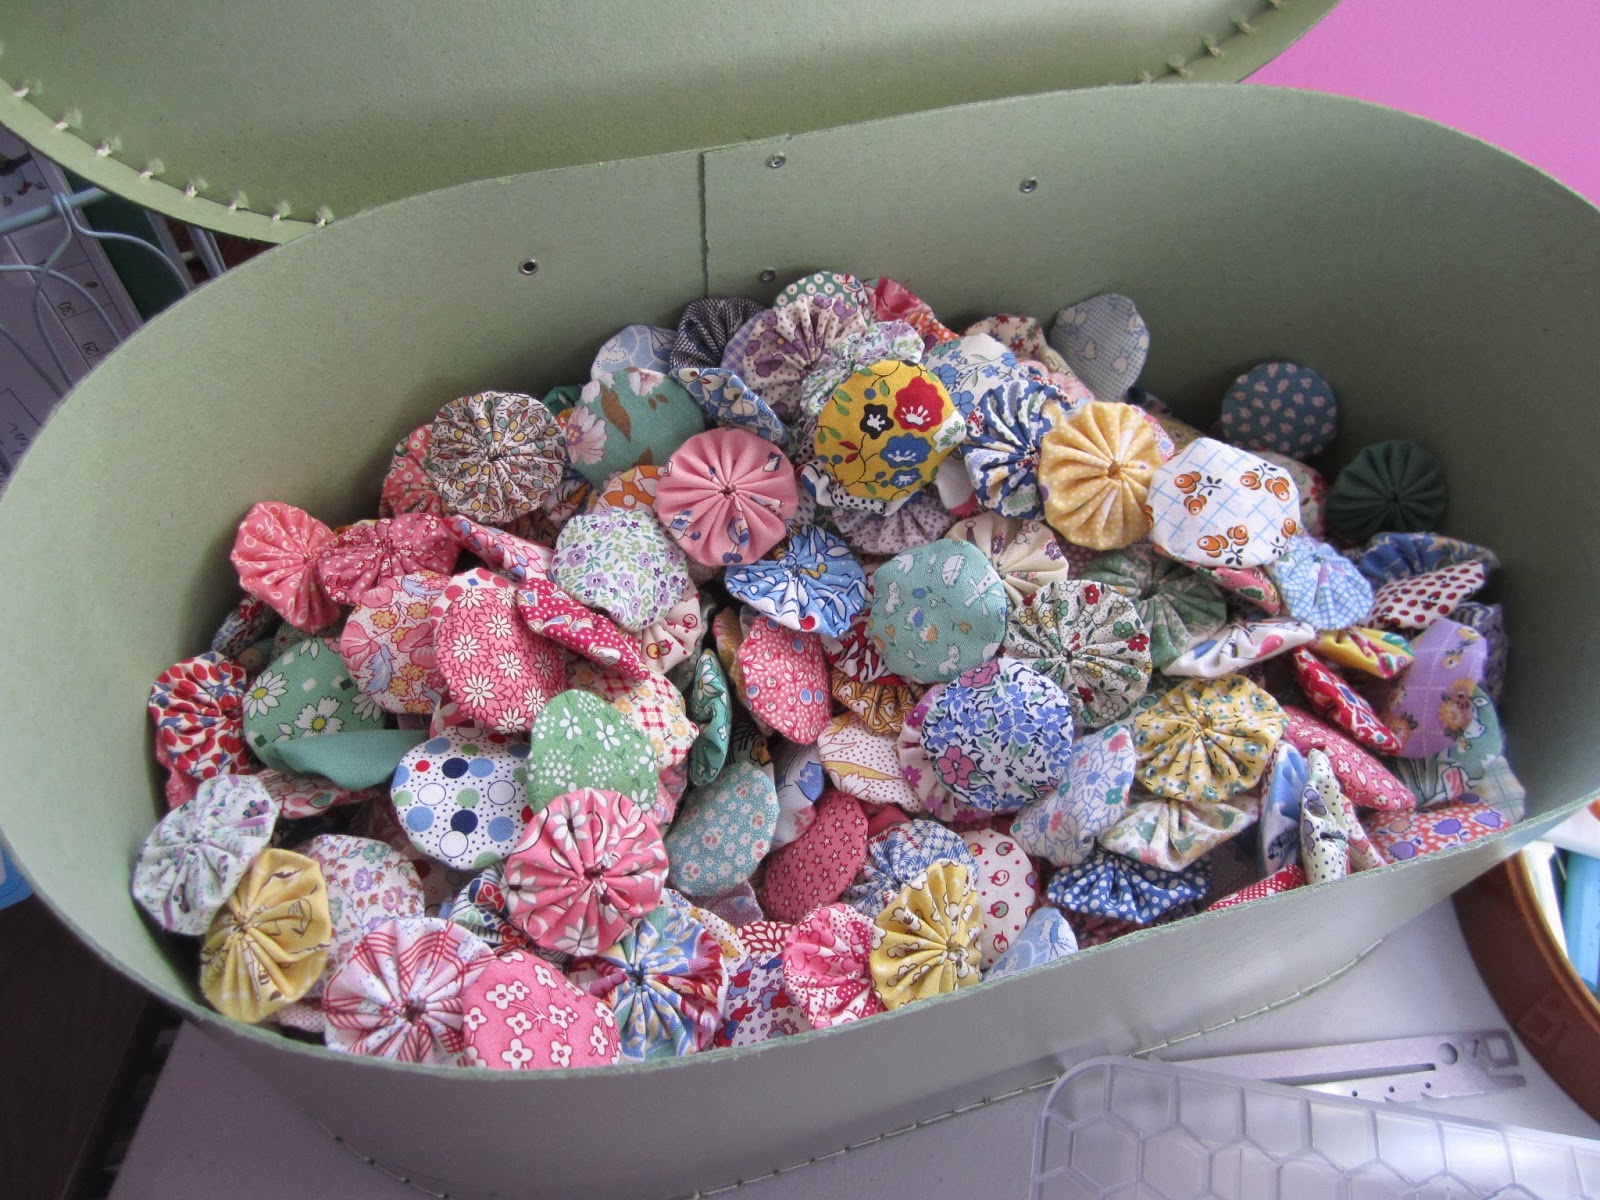
I've been stitching yo yo's for several years now, almost obsessively at times, without knowing what exactly they were destined to become. But as many a quilter will tell you, if you listen, your quilt will tell you what it wants to be. Sometimes it's best to follow your heart and proceed without knowing where it's going to end up!
It wasn't until I saw this picture on Pinterest that I knew what this quilt was going to become. I loved the idea of using solid colored yo yo's as sashing. And, the thought of stitching the yo yo's together in blocks seemed much less daunting than tackling a whole quilt all at once.

So, I sketched out a graph and calculated how many yo yo's I would need. I counted up my completed yo yo's and determined that by making the blocks 6 yo yo's by 6 yo yo's, and the quilt 4 blocks by 5 blocks, I would only need to stitch a few more yo yo's to come up with 720 yo yo's out of printed fabrics that would be required. Yea! I would still need to make 324 solid-colored yo yo's, but I could always cross that bridge later. :)
Once I had a plan in place, I was motivated to start stitching the yo yo's together in blocks, something I had been dreading.

I had started whip stitching some together a while ago,

but didn't like how they looked on the reverse side.

And, I was stumped on how to make sure they intersected at the right spots without getting distorted. That was enough to make me put the project aside.

Then, via Pinterest, I discovered another quilt blog that showed how to stitch yo yo's together by machine. I was greatly encouraged!!
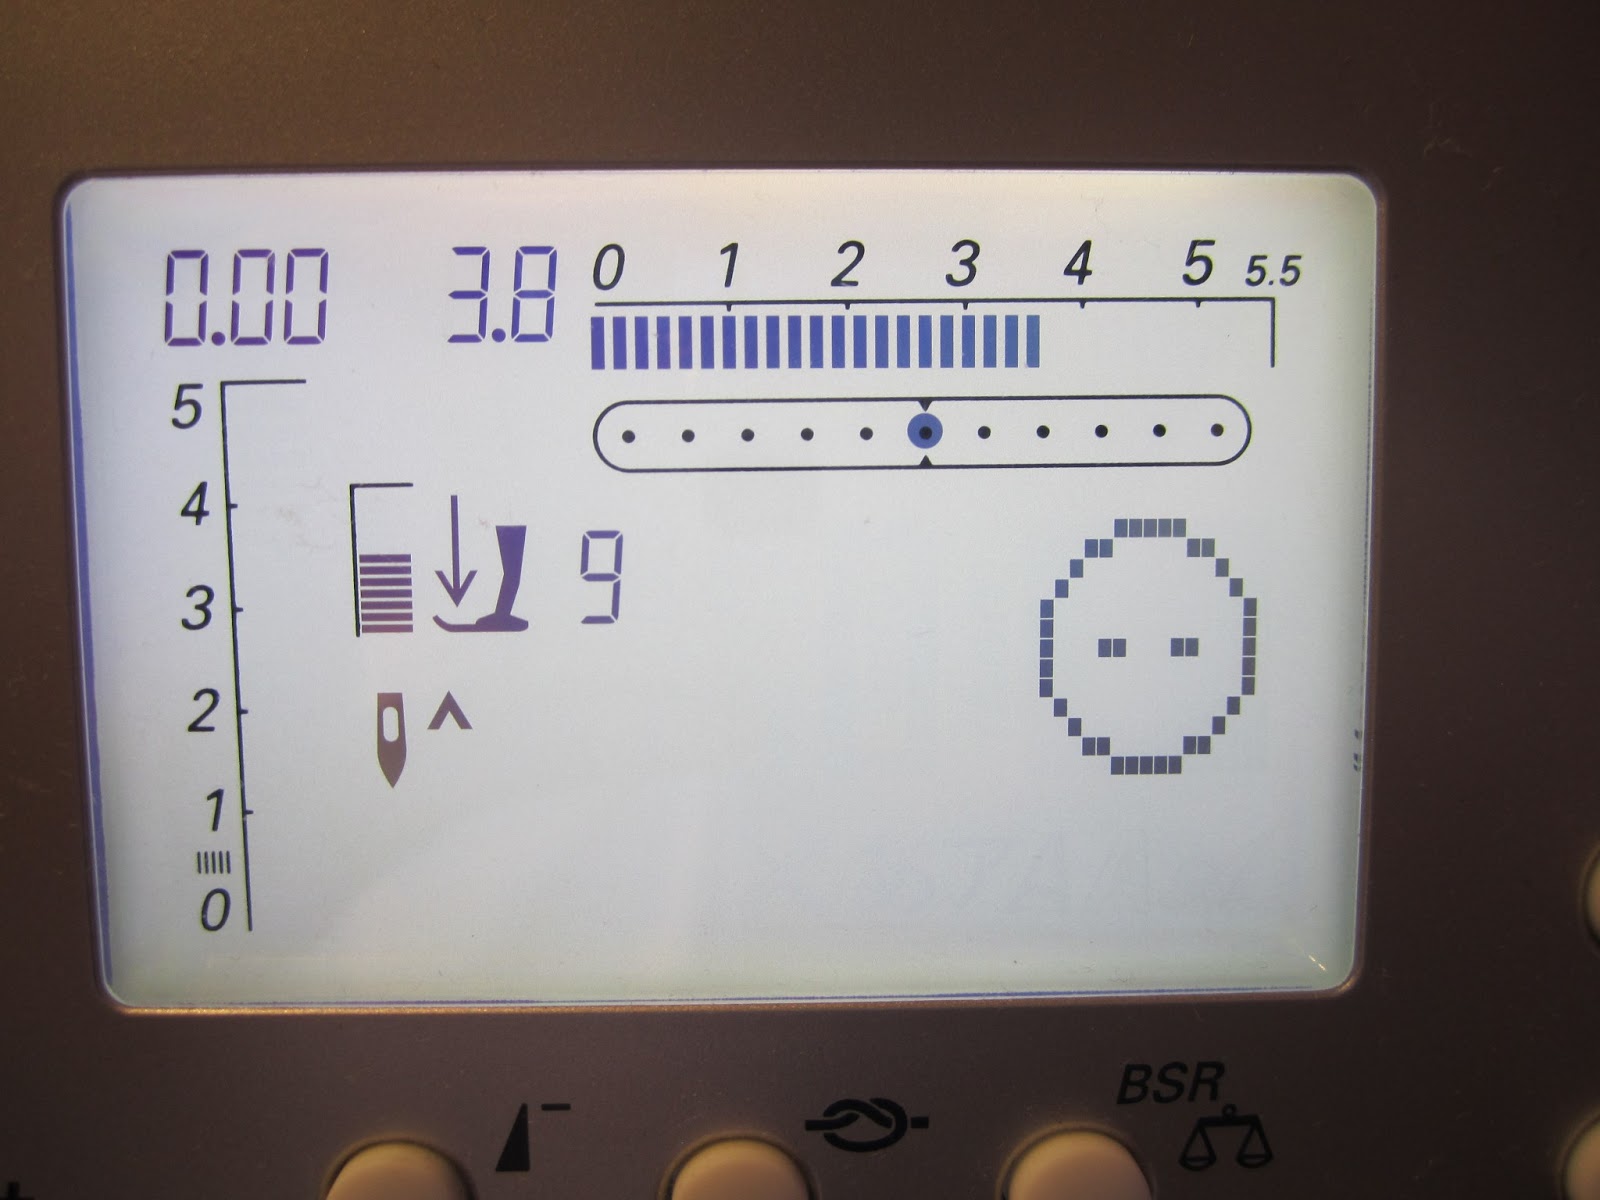
You simply select the button stitch feature (a better option than a zig zag stitch as it securely fastens the stitch),

and foot #9 for you Bernina folks.

I was so pleased with how nice it looked on both the front side...

... and the reverse side.

And, it was so much easier to keep them properly aligned when stitching them by machine vs. by hand.

To be continued!

No comments:
Post a Comment