Sunday, March 13, 2011
Saturday, March 12, 2011
Hip Knit Hats
I want to learn how to knit these cool hats! I'm tired of feeling like an old maid knitting dishcloths (even though I LOVE knitting them - shhhh - don't tell anyone....), and am ready to move on to something adventurous, not just a "lapghan" (a really, really big dishcloth!). I stumbled across this cool hat book today at Jo-Ann Fabrics, and kept arguing with myself re: purchasing it:
"Seriously, do you really think you're going to tackle these?"
"But I could knit them for Christmas presents!"
"Yeah right, they probably won't even fit.
And just when would you find time to do that?
Besides, good yarn is expensive!"
"But, it's on sale - it's 40% off...."
In the end, I decided the book was worth the money for the inspiration alone, whether or not I ever attempt them.
P.S. - I'm still enjoying the book....
:)
:)
Sunday, March 6, 2011
Worth Contemplating
"Don't let your past dictate who you are, but let it be part of who you will become."
- My Big Fat Greek Wedding
Monday, February 21, 2011
Saturday, February 19, 2011
Peter Reinhart's Classic French Bread
This is one of the simplest yeast bread recipes there is! I used to make French bread during my early post-college days, but Peter Reinhart's technique takes it to an entirely new level. As you can see, I'm still having fun with the Peter Reinhart cookbooks that I got for Christmas! I would highly recommend that you read his book, as this post doesn't contain his detailed instructions and helpful tips. I'm still perfecting my technique....
Source: Peter Reinhart's Artisan Breads Every Day
Makes 2 large loaves, 4 small loaves, or many rolls
24 oz. unbleached bread flour*
2 t. salt or 1 T. coarse kosher salt
2 1/4 t. instant yeast
2 c. lukewarm water (about 95 degrees)
The day before baking:
Combine all ingredients in a mixing bowl. Use a large spoon and stir for 1 minute, until well blended and smooth. If the spoon gets too doughy, dip in in a bowl of warm water. The dough should form a coarse shaggy ball. Let it rest, uncovered, for 5 minutes.
Transfer dough to lightly floured work surface and knead by hand for about 2 minutes, adjusting with flour or water as needed. The dough should be smooth, supple, and tacky but not sticky.
Knead the dough for about 1 minute more, then transfer it to a clean, lightly oiled bowl. Cover the bowl with plastic wrap, then immediately refrigerate overnight or for up to 4 days.
On baking day:
Remove dough from refrigerator about 2 hours before you plan to bake. Gently transfer it to a lightly floured work surface, taking care to degas it as little as possible. Form the dough into 2 loaves or into 4 small loaves. Mist the top of the dough with spray oil, loosely cover with plastic wrap, and proof at room temperature for about 1 1/2 hours, until increased to 1 1/2 times its original size.
About 45 minutes before baking, place a rimmed baking sheet on lowest rack, place baking stone on rack in middle of oven and preheat the oven as high as it will go.
Remove the plastic wrap from the dough 15 minutes prior to baking. Transfer dough onto a floured peel or the back of a cookie sheet.
Just prior to baking, score the dough 1/2" deep with a serrated knife. Transfer the dough to the oven, pour 1 c. hot water (Be careful!! I use a watering can with a long, narrow spout) into the steam pan, then lower the oven temperature to 450 degrees.
Bake for 10 minutes, then rotate the loaf and bake for another 8-10 minutes, until the crust is a rich golden brown, the loaves sound hollow when thumped, and the internal temperature is about 200 degrees in the center. For a crisper crust, turn off the oven an leave the bread in for another 5 minutes before removing.
Cool the bread on a wire rack for at least 45 minutes before slicing or serving.
*Note: I like to use King Arthur flour because it comes from non-GMO wheat.
Friday, February 11, 2011
Cooking Neck Pumpkins
I had purchased this neck pumpkin late last fall for a song, but never got around to cooking it off until now. I figured I had better get to it before it passed its peak!
I had never cooked a pumpkin before, so had to do a bit of research before attempting it. I'm happy to report that it was much easier than I anticipated!
Here's the How-To:
Simply cut the pumpkin in half and scoop out the seeds. Then, place the pumpkin halves face down on a rimmed baking sheet, adding some water to the pan to help keep the pumpkin flesh moist. Bake at 450" until you can piece the skin with a fork (about 45 - 60 minutes).
Then, scoop out the flesh out of the shell and puree in a blender.
(My Vitamix has an extra-large jar which worked great for this. I froze the puree in 2 c. quantities so that it's ready to use any time I need canned pumpkin for a recipe in the future.)
P.S. Don't toss the pumpkin seeds - be sure to toast them so you can not only enjoy a tasty snack, but benefit from the nutrients as well!
Monday, February 7, 2011
Sunday, February 6, 2011
Quilting Away!
This winter weather is the perfect weather for stitching some quick and easy quilts!
First, a small lap quilt in subtle shades:
Then, a very simple design showcasing some fabulous Amy Butler fabrics:
Next project: another simple pattern out of this fun, whimsy fabric:
Still not sure how I want to machine quilt these quilt tops, so I'll fold them away until the inspiration hits! :)
Wednesday, February 2, 2011
Sunday, January 30, 2011
Miss Potter
"There's something delicious about writing those first words of a story. You can never quite tell where they'll take you. Mine took me here, where I belong."
- the character Beatrix Potter, in the wonderful movie Miss Potter
Sunday, January 23, 2011
Simple Pleasures
I popped in at a food outlet yesterday on the way home from installing curtains for a customer - you can't beat a box of beautiful Clementines from Spain for only $2.29!
Clementines always remind me of a wonderful trip to Spain in December '91/January '92 to visit a college friend....
Broccoli Sprouts
Broccoli sprouts are a nice way to get some fresh greens into your diet without compromising a commitment to local, in-season eating. It's so easy, and economical, not to mention healthful!
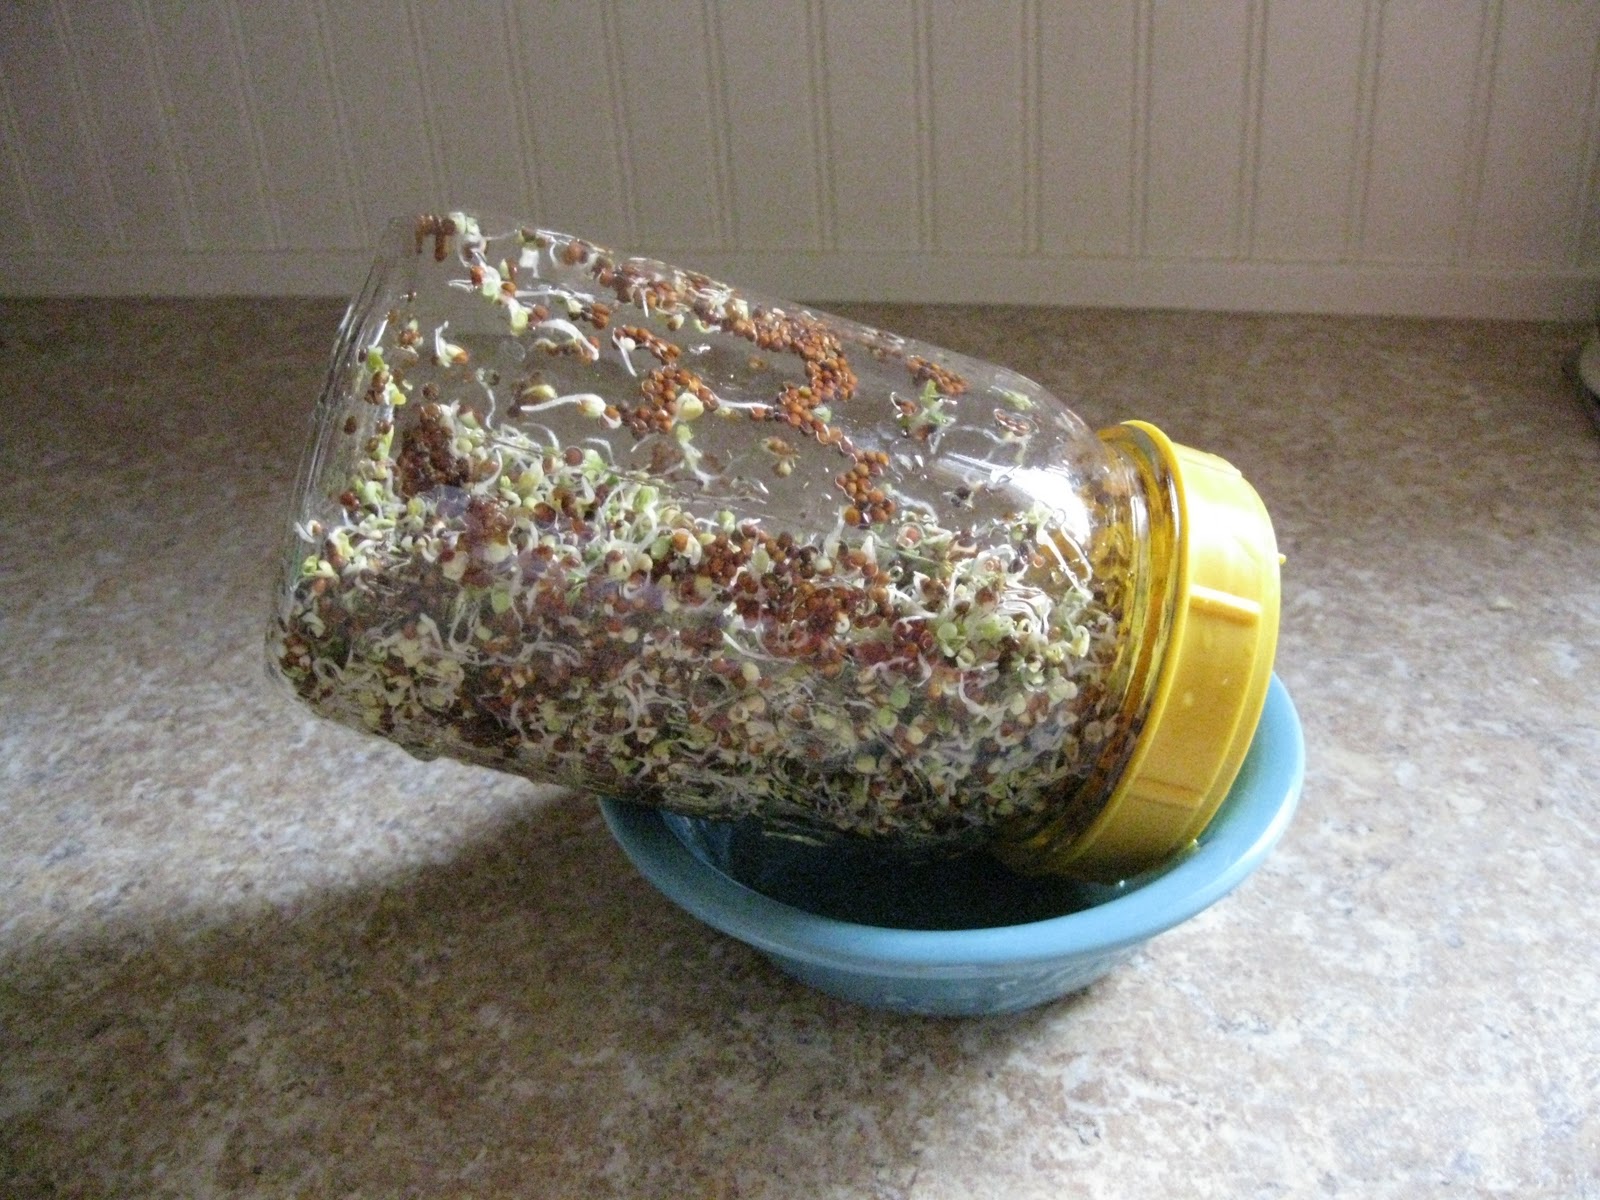
Simply soak 3 T. of broccoli seeds overnight in cool water. I use a wide-mouth mason jar, fitted with a sprouting lid. You can also improvise with a piece of cheesecloth and a jar ring.
Day One: In the morning, drain and invert jar. Rinse and drain the seeds/sprouts two times per day until fully developed.
Day Two
Day Three
Day Four
(Switch to a larger screen lid so you can rinse the hulls away.)
Day Five
Store in refrigerator right in the jar.
How cool is that??!!
I love them on baked potatoes, but often eat a handful of them for breakfast - just because I think it's such a cool thing to be able to participate in growing my own nutritious food in the middle of the winter!
Knitted Dishcloths
I love knitted dishcloths made out of 100% cotton yarn! In fact, I love knitting them, love looking at them, love using them, and love giving them to kindred spirits who are as in love with them as I am.
They make wonderful little gifts.
There's just something soothing about the process of knitting them - the cushy yarn is so comforting. Maybe because my mom knitted them and gave me the directions??
I often tuck my knitting in my airport carry-on or take it along when riding in the passenger seat of a car. I have to admit that it is embarrassing when someone asks, "What are you knitting?" Somehow, the answer "dishcloth" isn't very glamorous or creative, and certainly doesn't dispel the old maid image. But, I still love knitting them, love looking at them, love using them, and love giving them away.
I just bought a new shade of yarn yesterday. :)
Here are the instructions:
1 ball Lily Sugar'n Cream yarn (important - must be 100% cotton!)
#8 knitting needles
Cast on 4 stitches.
Knit first row
To begin increasing:
Knit 2 stitches, yarn over, knit rest of row.
Repeat last row to 45-50 stitches.
To begin decreasing:
Knit 1, knit 2 stitches together, yarn over, knit 2 together, knit rest of row.
Repeat until 4 stitches left.
Cast off.
Saturday, January 22, 2011
Job Completed!
I just installed these curtains today; it feels good to finish up such a big project! Actually, the sewing wasn't difficult, but since the window was so big, the cornice board was 96 1/2" long - practically the full length of my living room; it barely fits in a vehicle! I was eager to get it out of my house so I could have my living room back. The customer asked me to simply duplicate her existing window treatment in coordinating fabrics to match her new sofa and pillows since she was so happy with the design of the original cornice, swags and jabots. The burgundy fabric is 100% silk, so I lined it with cotton interlining to give it a bit of body and a soft drape.
Here's the before picture:
It's tricky taking pictures of window treatments, especially in the winter; the sun reflects on the snow and makes it that much more difficult to get enough light inside without the flash washing out the color. I always try to get a picture so I can refer back to it if necessary.
Saturday, January 15, 2011
Vintage Tag
This vintage piece of Tupperware belonged to my Great Aunt Mary Kinsey, thus the initial "K" on the adhesive tape tag. I'm so glad the tag is still intact; every time I use this it reminds me of her, her legendary cooking, and lovely memories of our family visiting her many times during my childhood. It also reminds me of my mom (who labeled her dishes that way also!) and the various potlucks and covered dishes that we attended over the years.
I miss those simpler days!
Subscribe to:
Posts (Atom)